FAQ:
3D Printing
- Important reminders & tips
- When to regenerate/refresh a model?
- What are “Burn in“ layers?
- Resin profiles
- Do I need to make any adjustments?
- Adjusting the end stop
- Ball-joint build platform
- Maintenance of the vat’s FEP
- Can I pause and resume printing?
- What is “anti-aliasing“?
- What does the layer number field in the ‘Models’ section do?
- Tips & Tricks
- Always use gloves when dealing with uncured resin.
- Never look directly at UV light. You may choose to wear some red or orange tinted safety glasses which are designed to block near-UV wavelengths such as 405nm.
- NEVER remove your vat from the Lotus EZ with your wet build platform in place. This will drip resin onto the LCD surface.
- Always ensure you dispose of all contaminated materials and resin appropriate. Please see our Cleaning and safetysection.
- Keep your vat’s FEP film clean and free from scratches and indentations. If in doubt about your vat FEP’s integrity, replace it. You can also test it with water for any leaks first.
- Work in a well-ventilated space away from pets and children.
- Keep paper towels and Isopropyl alcohol or similar close by. You don’t want to be running across the room everytime you need it.
When you make a change to a resin profile, you will see a warning back on the models page on any model that uses that profile that says: “Resin profile change detected. Please refresh the model.”
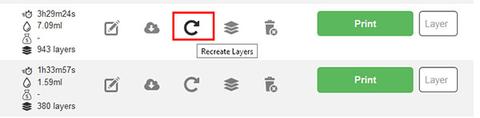
This will occur when you make any change to the resin profile but it is important to note that NOT ALL changes to a resin profile require a refresh or regeneration of the model slices. For example, if you have only changed exposure times on your profile, you do NOT need to refresh the model’s layers. However, if you change the model’s layer height or options such as Pixel dimming or anti-aliasing, you will need to regenerate the model’s slices by hitting refresh.
“Burn in” layers are the first 4-8 layers of each print which are commonly exposed for around 10 times the length of the “normal” layers. This allows the print to really stick to the build platform.
Burn in layers provide a solid base that withstands suction forces throughout printing. The burn in layers are also commonly used for the height of a raft, if your model has one. Our standard profile for EZResin for example has 8 burn in layers that are each exposed for 125 seconds.
We have shipped the Lotus EZ preloaded with a resin profile adjusted for our EZResin. This profile will be a great place to start with almost any model you can throw at it. Its layers are 40 microns each (0.04mm), and each layer takes 12 seconds (1 second pause + 11 seconds exposure). However, over time you may want to experiment with different settings – this of course is natural and encouraged!
An easy way to do this without starting from scratch is simply duplicating the EZResin default profile. You can do this by navigating to the Resins page and selecting the duplicate icon. You can then rename the profile, adjust the layer height and exposure times as you wish. There are many options to modify and each option has a helpful hint button next to it you can read to help you decide on the value.
The Lotus EZ was developed to involve minimal user-required adjustments. We originally shipped the Lotus EZ with the only thing that could be adjusted being the end-stop. This was pre-set during quality control of all Lotus EZs, but you may want to adjust this yourself. For instructions on this, see the section on “Adjusting the end stop”.
To adjust the end stop, the first step is to remove the vat from your Lotus EZ. Clean your platform thoroughly and ensure it has no dirt or resin residue remaining. Now place the platform on the arm.
Next step is to turn your Lotus EZ on and connect to it and browse to the Dashboard. There you will navigate to the Settings page, and select the Tools tab. You can then browse to the Platform controls section.
Selecting Floor from this page will floor your platform to the LCD. With a small slip of regular printer paper (approx. 3cm wide, 15cm long), you can place it on the LCD between it and the platform and wiggle it and feel resistance.
To adjust the end stop to be looser or tighter, you can remove the black cap on the back of the arm above what we call the ‘trigger’. In this hole you can use a 2.5mm hex key to adjust the bolt that protrudes from the bottom of the trigger. Turning the bolt left (looking from above) will make the zero point tighter, while turning right will make it looser.
The process for adjusting the end stop is:
- Floor the platform with the paper slip on the LCD.
- Check the level with the paper slip by wiggling and sliding it around.
- Move the platform up 10mm with the button on the dashboard and then make adjustments (suggested to only make half turns each time)
- Floor the platform again to check the level. You are looking for an obvious amount of resistance, but not too tight that the paper crinkles or stops moving altogether.
- Repeat moving the platform up, adjusting and then flooring to check until satisfied.
Note: Tightening the end stop too far, will start to disengage the magnets between the platform and arm. This is a designed safety feature to stop the platform from ever putting too much force on the LCD. You should be able to visually see at the correct zero point, that the platform is still perfectly seated in the arm without lifting off the magnetised seating.
We are currently finalising the development of the ball-joint connection for the platform.
We will update advice here on appropriate adjustment technique once shipped.
FEP is short for “Fluorinated ethylene propylene”. It is commonly used in SLA LCD 3D printers for its excellent light transmission, low friction and chemical resistance properties. You can read more on FEP its the wikipedia page.
Each Lotus EZ was provided with an additional FEP film for you to replace when necessary. It is good practice before printing to check the integrity of the FEP film on your vat to ensure there is no deep scratches or leaking. Resin leaking onto the LCD will lead to cured resin on your display which will compromise future prints. Before printing, you can easily lift your vat from the Lotus EZ and lift it up to observe the underside to check for residue coming from the retaining plate. If you see residue it might be time to replace your FEP. To see how to do this please watch our short video on Youtube.
You will also know it’s time to replace your FEP when it becomes excessively scratched or cloudy. With proper care and cleaning, we’ve seen FEP films last through months of printing, however this depends on the amount you print, the resin used and many other factors. If in doubt, replace your film.
Tips to care for your vat and FEP film:
- If you are replacing your FEP film, we always recommend to test the new film first by filling the vat with water and sitting it on a paper towel on a flat bench for an hour or two. This will show you if there is any leaking or if it is not water right. If satisfied you can then remove the water, dry the vat thoroughly and proceed to printing.
- Don’t leave resin for extended periods of time in the vat. Always return it to the bottle with the funnel. The funnel has a strainer to ensure no cured bits are returned into the bottle. You can also check the vat for small bits prior to returning the resin to the bottle, and simply pour through the funnel without the strainer.
- Once you empty your vat, always clean it with Isopropyl alcohol (IPA) or similar (e.g. Mentholated spirits) and paper towel to remove excess resin. You can wipe down all surfaces with IPA on your Lotus EZ.
- Only ever use the provided black scraper or similar tool to sift through or stir resin in the vat.
- Do not use pointed scrapers or other sharp objects as this often leads to punctures or scratches in the film.
Yes, you can pause printing easily with the pause button you see on the main dashboard page. The platform will then move to a stop point. If you would like to see the progress of the print but the platform is still too far down to see the model fully, you can navigate to the Settings page and then the tools tab to access the Platform controls section.
You can then select to move it up by increments of 10mm for example to better see the progress. Once you are satisfied, you can then navigate back to the main page and select resume.
Note: It is important during this process to never move the z-axis or platform manually up or down as the Lotus EZ will not register the current level at which it paused and this will cause a failure when you resume.
It is occasionally the case that pausing and resuming a print can cause layer lines at the point that you paused the print.
Anti-aliasing is an option for slicing your models that helps smooth transitions between layers that may have a step like feature. This is most notable between layers that have different surface layers. Additive printing of all types, is limited by its resolution. While SLA printing achieves fantastic resolutions that create very smooth surfaces, it is still possible to see “step” like features even at very low z-axis resolutions of 0.04mm. Anti-aliasing in LCD SLA printing shades inbetween pixels in the steps in order to smooth a transition between slices that differ in surface area.
Our Lotus EZ has an option in resin profiles to either turn this on or off. Anti-aliasing is equal to 8x rendering and bicubic resizing for those interested.
With very small, thin sections of models, anti-aliasing can sometimes cause partial or full print failures if this stepping interrupts the model’s ability to build upon itself. If you are having problems with an extremely detailed, thin sectioned model, you may wish to try turning anti-aliasing off and try again.
You can read more about anti-aliasing on the helpful Wikipedia page.
The Layer number field in the Models section of the dashboard is a simple way of resuming a print if you stopped the print mid-way or experienced a power outage.
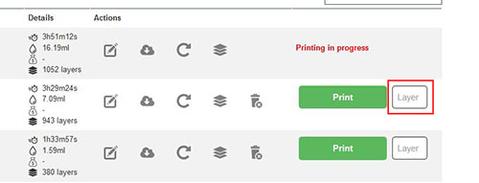
The Lotus EZ upon stopping a print with the Stop button, or a power outage, saves the progress of the print and the Z-axis position. If this occurs, and your model is still in place on the build platform, you can simply browse back to the models page and hit Print and it will start printing from the layer number indicated.
It is important in this case, that you do not manually move the z-axis position, or the positioning of the layer will not be correct and will lead to a print failure or serious malfunction of the Lotus EZ.
If you stopped a print or experienced an outage mid-print, and would like to start from the model’s first layer, you must delete the current layer number, and enter “1”. Simply deleting the number will not work, you must enter “1”.
- Always SHAKE your bottle of resin before pouring into the vat and starting a print. If there is resin already in your vat and it has been sitting for a while, use the black slotted scraper provided to gently move the resin around. This is also the case after finishing a long print and starting on your next print. After shaking your resin and pouring some into your vat, you will notice that there will be some bubbling. This is normal. You do not need to wait for the bubbles to dissipate to start printing.
- Always maintain a clean environment and have tools and materials laid out ready for when you need to clean things.
- It can be a good idea to check all systems are operational on the Lotus EZ before starting a print. You can do this by removing the vat and platform and browsing to the Settings section, tools tab and using the Platform controls and display tests to ensure both the end stop is function, and the LED array and LCD are functioning as required.
- Don’t overfill your vat with resin. Although some prints may require ample amount of resin, we recommend you only fill your vat with approximately 5mm depth of resin at any one time.
- Similarly, too little resin might mean that there is not enough coverage of resin to cure for the layer.